
AI Relighting to Create 9 Portrait Lighting Styles

Lien Anh Vu
October 13, 2026
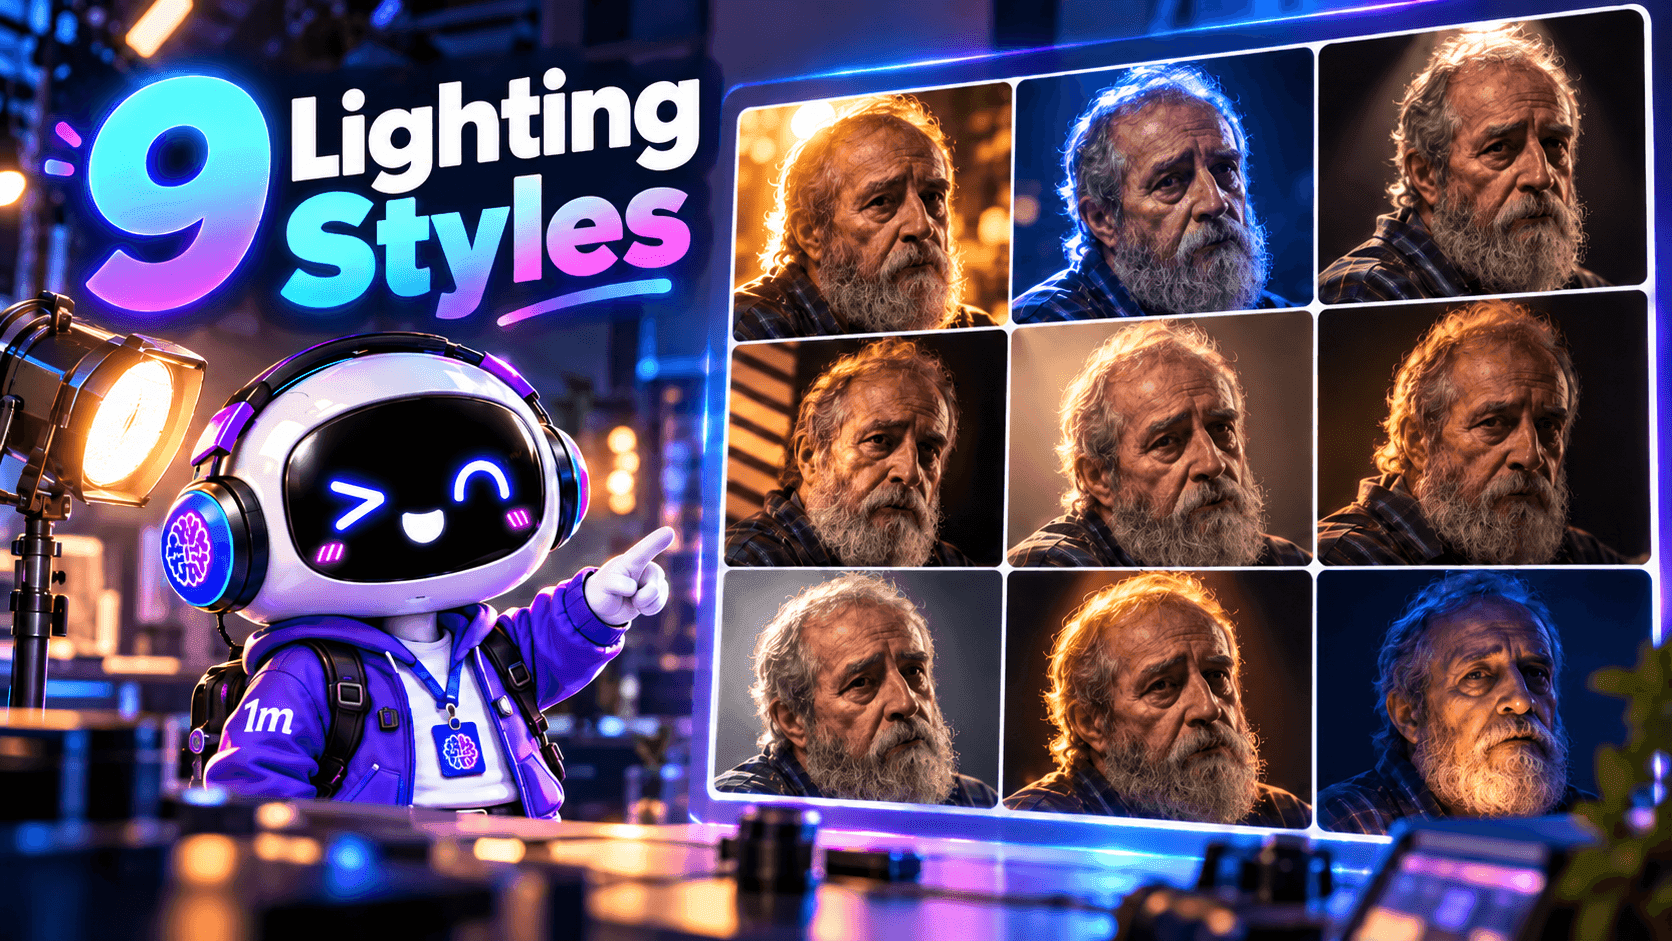
Learn AI relighting with 9 portrait lighting styles using FLUX.2 Max on 1min.AI. Preview lighting setups before your next shoot with practical AI prompts.
Great lighting can transform an ordinary portrait into a cinematic visual, but testing multiple lighting setups before a shoot takes time, equipment, and careful planning. With AI relighting, creators can explore different lighting directions, intensities, and moods using just one reference image.
In this guide, you'll learn how to use FLUX.2 Max on 1min.AI to create nine portrait lighting styles, compare their effects, and preview potential lighting setups before your next UGC, photography, or video shoot.
One Portrait. Nine Lighting Styles. Same Identity.
What Is AI Relighting?
AI relighting uses artificial intelligence to modify the lighting in an existing image while attempting to preserve the original subject and composition. By changing light direction, intensity, color temperature, and shadow placement, creators can explore different visual moods without capturing a new photograph for every setup.
Lighting significantly influences how viewers perceive a portrait. Soft frontal illumination creates a clean, approachable appearance, while dramatic side lighting emphasizes facial structure and depth. Backlighting introduces separation between the subject and background, while Rembrandt lighting produces a distinctive triangular highlight on the shadowed cheek.
For UGC creators, photographers, and videographers, AI relighting is particularly useful during pre-production. Instead of spending valuable on-site time testing numerous lighting arrangements, creators can generate visual references, compare different approaches, and prepare a clearer lighting plan before filming. These AI-generated images serve as creative previews rather than physically accurate simulations of real lighting equipment.
Why AI Relighting Matters for Creators
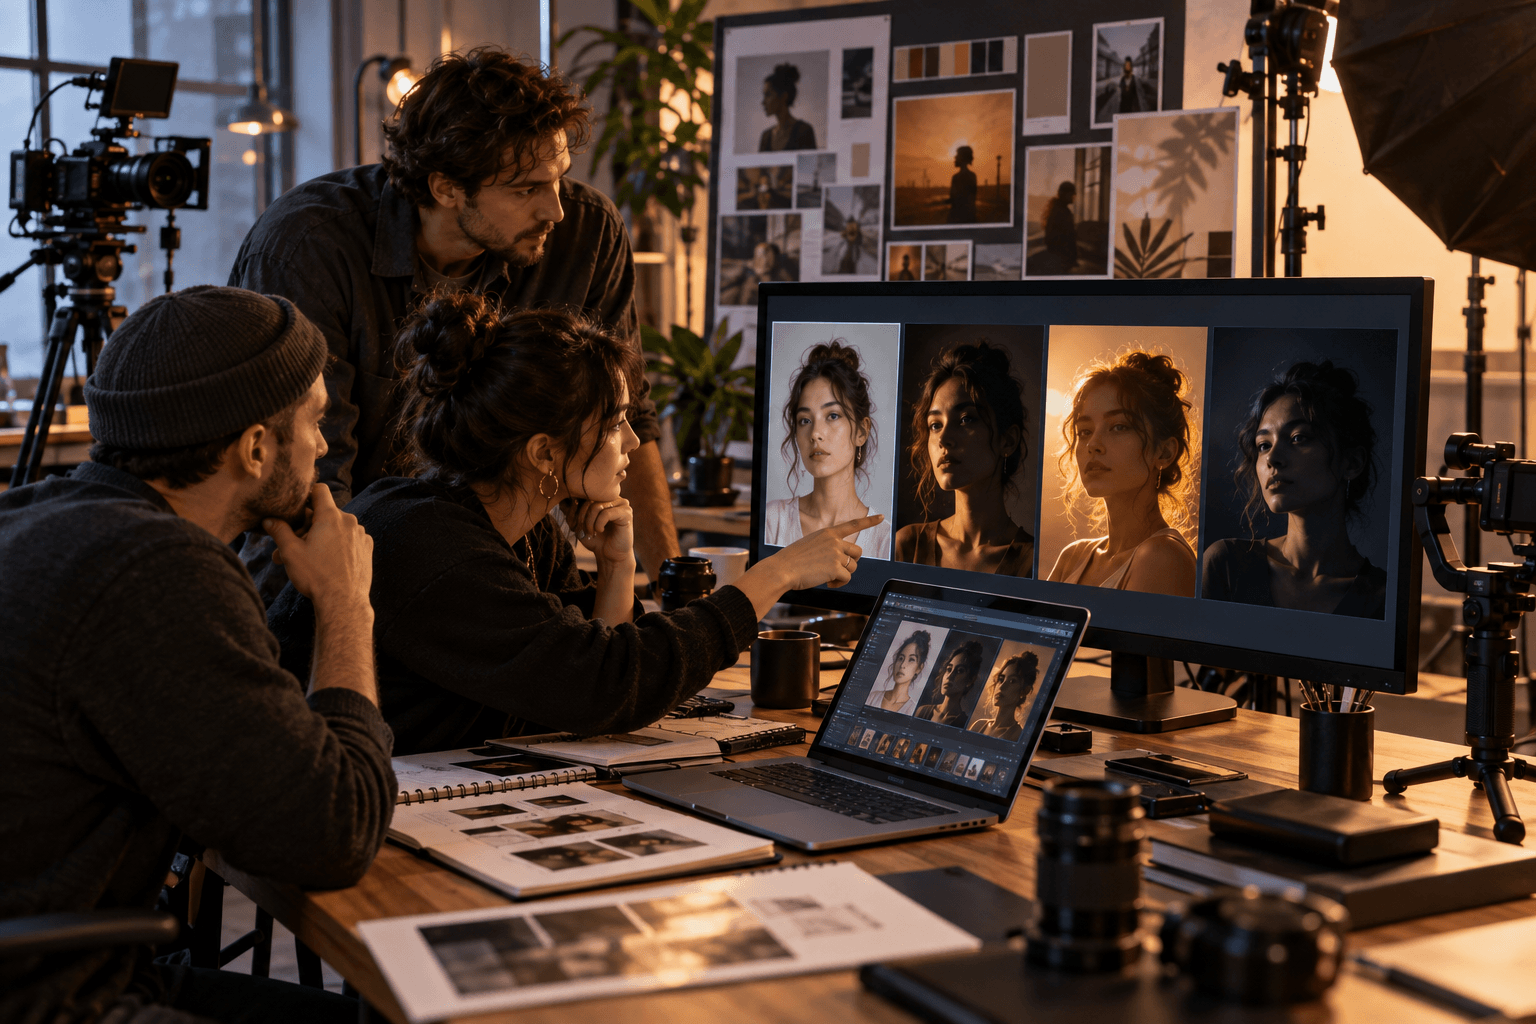
Imagine preparing a skincare UGC video. You want flattering illumination, natural skin texture, and a professional appearance, but you're unsure whether front lighting, butterfly lighting, or a soft 45-degree key light will work best. AI relighting allows you to preview these approaches using the same portrait before setting up your camera.
This workflow can help creators make more informed production decisions, especially when working with limited equipment, small spaces, or tight deadlines.
| Benefit | Practical Application |
|---|---|
| Faster pre-production | Preview lighting ideas before arriving on set |
| Better creative direction | Compare visual moods for different campaigns |
| Equipment planning | Identify potential lighting and reflector requirements |
| Consistent visual identity | Experiment with lighting while preserving the same subject |
| Clearer team communication | Share lighting references with clients or production teams |
The biggest advantage isn't simply producing more attractive portraits. It's being able to test visual ideas before committing time and resources to a real shoot.
How to Create 9 Lighting Styles with 1min.AI
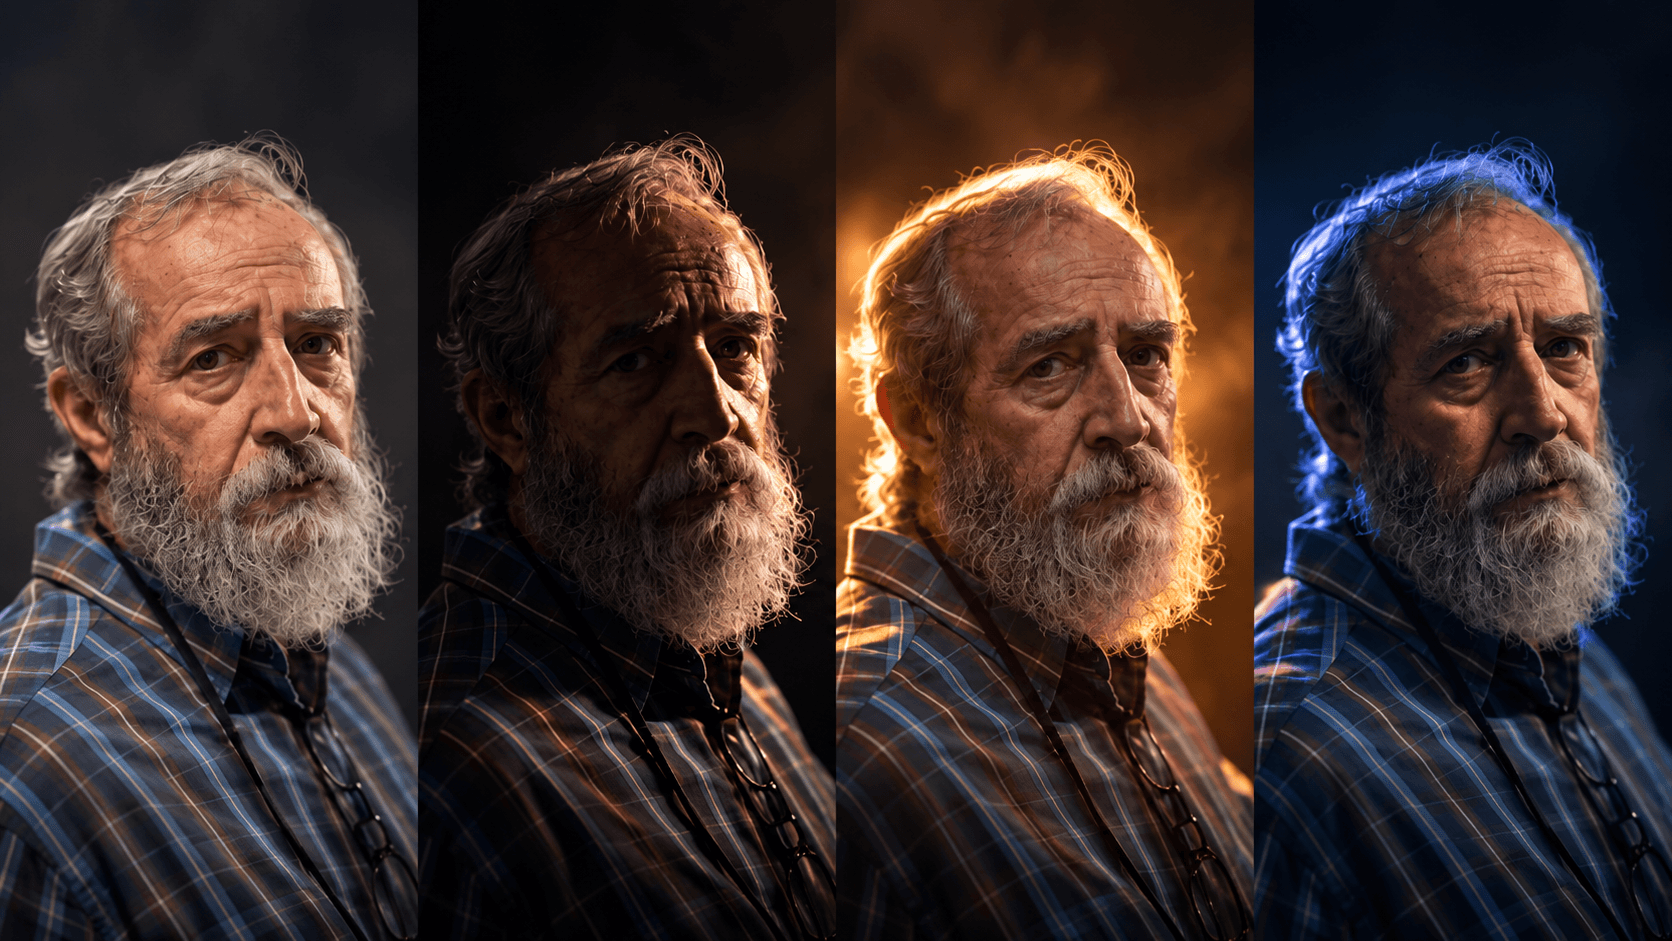
You don't need an expensive studio setup to experiment with professional portrait lighting. Using a reference image and structured AI lighting prompts, you can explore different lighting conditions with FLUX.2 Max by Black Forest Labs through 1min.AI.
The workflow is straightforward: Original Portrait → FLUX.2 Max → Lighting Prompts → 9 Lighting Variations → Final Comparison Grid.
Step 1: Prepare Your Reference Portrait
Start with a clear portrait of a real person, AI-generated model, virtual influencer, or illustrated character. For realistic lighting comparisons, choose a front-facing or slightly angled image with visible facial details, natural skin texture, and a relatively simple background.
A portrait with neutral lighting works particularly well because it provides a consistent foundation for testing different lighting directions. Avoid images with extremely dark shadows, heavy filters, or distracting objects covering the face.
Save the image as your Master Portrait Reference and use it for all nine variations. Keeping the original subject, clothing, hairstyle, camera angle, and composition consistent makes it easier to evaluate how the lighting changes each result.
Step 2: Open FLUX.2 Max on 1min.AI
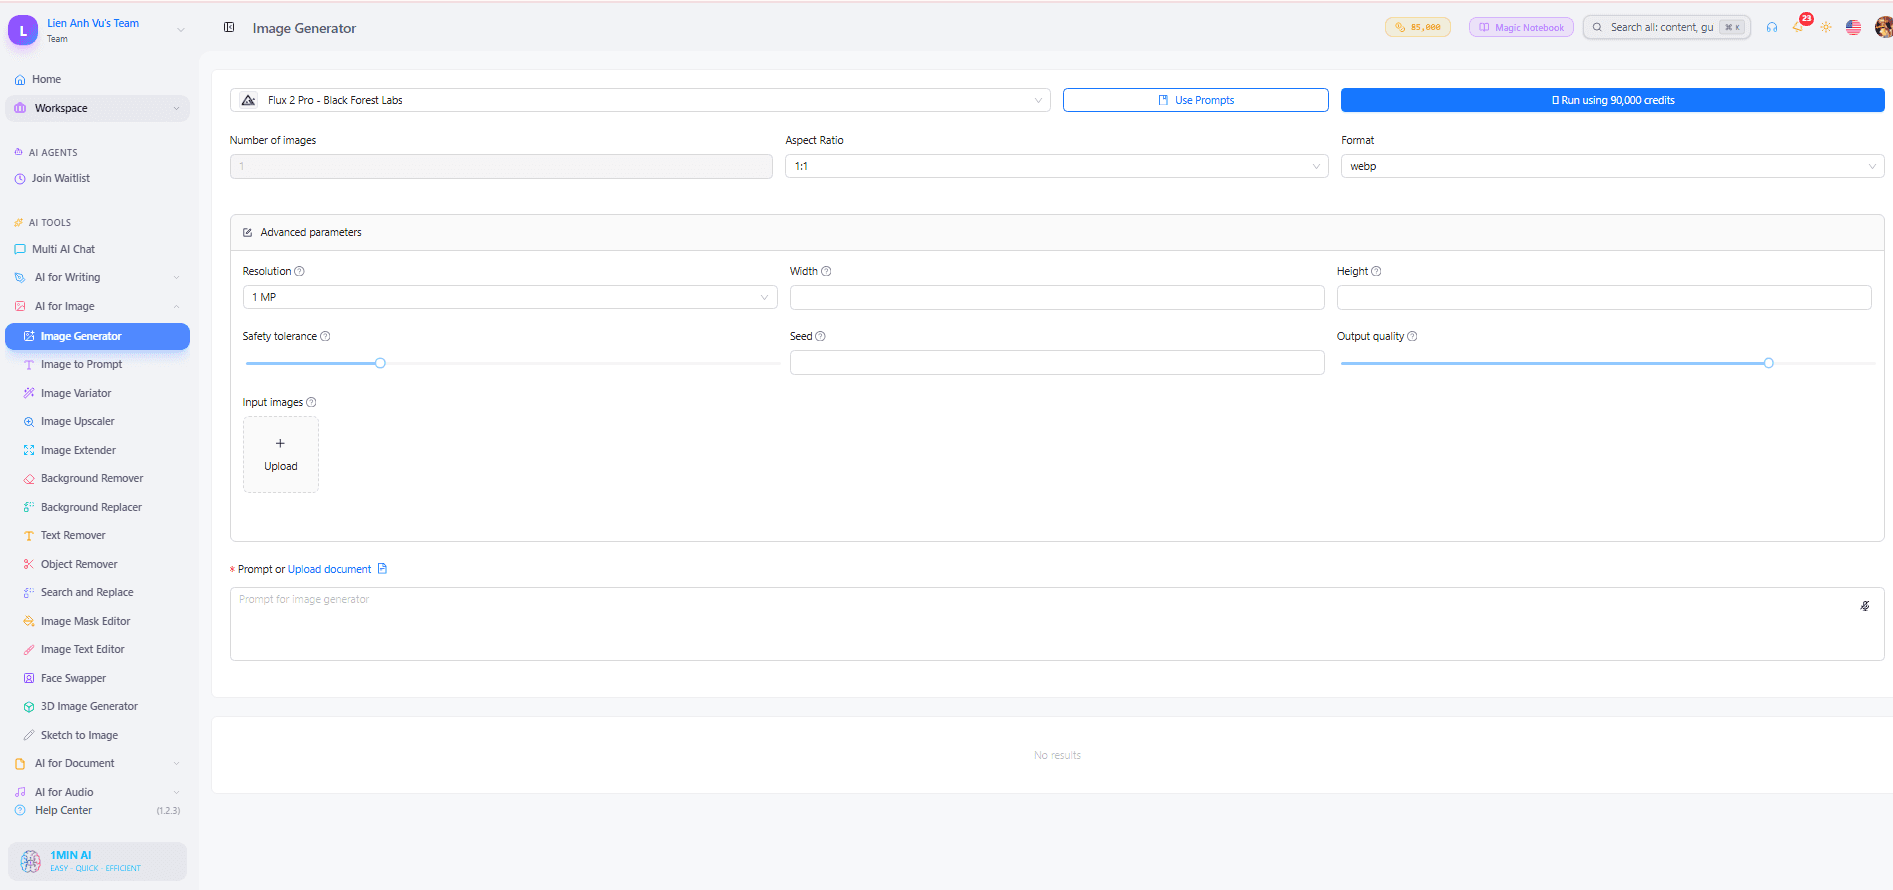
Visit 1min.AI and navigate to AI for Image → Image Generator. Select FLUX.2 Max by Black Forest Labs, then upload your Master Portrait Reference.
The uploaded image provides visual information about your subject's appearance and composition. Your prompt will describe the lighting adjustments you want while instructing the model to preserve those original details.
For reliable comparisons, keep the same reference image and aspect ratio throughout the workflow. Start by testing one lighting style before generating all nine variations.
Step 3: Create Your AI Relighting Prompt
An effective AI relighting prompt needs more detail than simply requesting "cinematic lighting." To make the results useful for creative planning, describe the light source's direction, relative intensity, softness, color temperature, and resulting shadows.
Use the following structure:
Reference Image + Identity Preservation + Light Direction + Intensity + Light Quality + Color Temperature + Shadow Contrast
Master AI Relighting Prompt
Use the uploaded portrait as the primary visual reference.
Preserve the subject's facial identity, facial proportions,
hairstyle, skin texture, clothing, pose, background, and
camera composition.

Apply [LIGHTING STYLE] with the primary light positioned at
[LIGHT DIRECTION AND ANGLE]. Use [LIGHT INTENSITY],
[LIGHT QUALITY], and approximately [COLOR TEMPERATURE].

Create [SHADOW AND CONTRAST DETAILS] while maintaining
realistic exposure, natural skin tones, and photographic depth.

Change only the illumination, highlights, and shadows.
Do not alter the subject's face, clothing, camera angle,
background, or original composition.
Avoid artificial skin smoothing and unrealistic lighting effects.
Replace the bracketed elements with the specifications for each lighting style below. If you want assistance preparing or refining prompts, you can optionally use Multi AI Chat on 1min.AI, specify FLUX.2 Max as your target model, and request structured lighting instructions.
Keep in mind that values such as 5600K, 45-degree angles, or 4:1 lighting ratios describe the intended visual result. They are useful creative references, but AI image models do not necessarily reproduce these measurements with physical accuracy.
Step 4: Generate 9 Portrait Lighting Styles
Use the same Master Portrait Reference for every variation. Combine the identity-preservation instructions from the master prompt with each lighting description below, then generate the results separately.
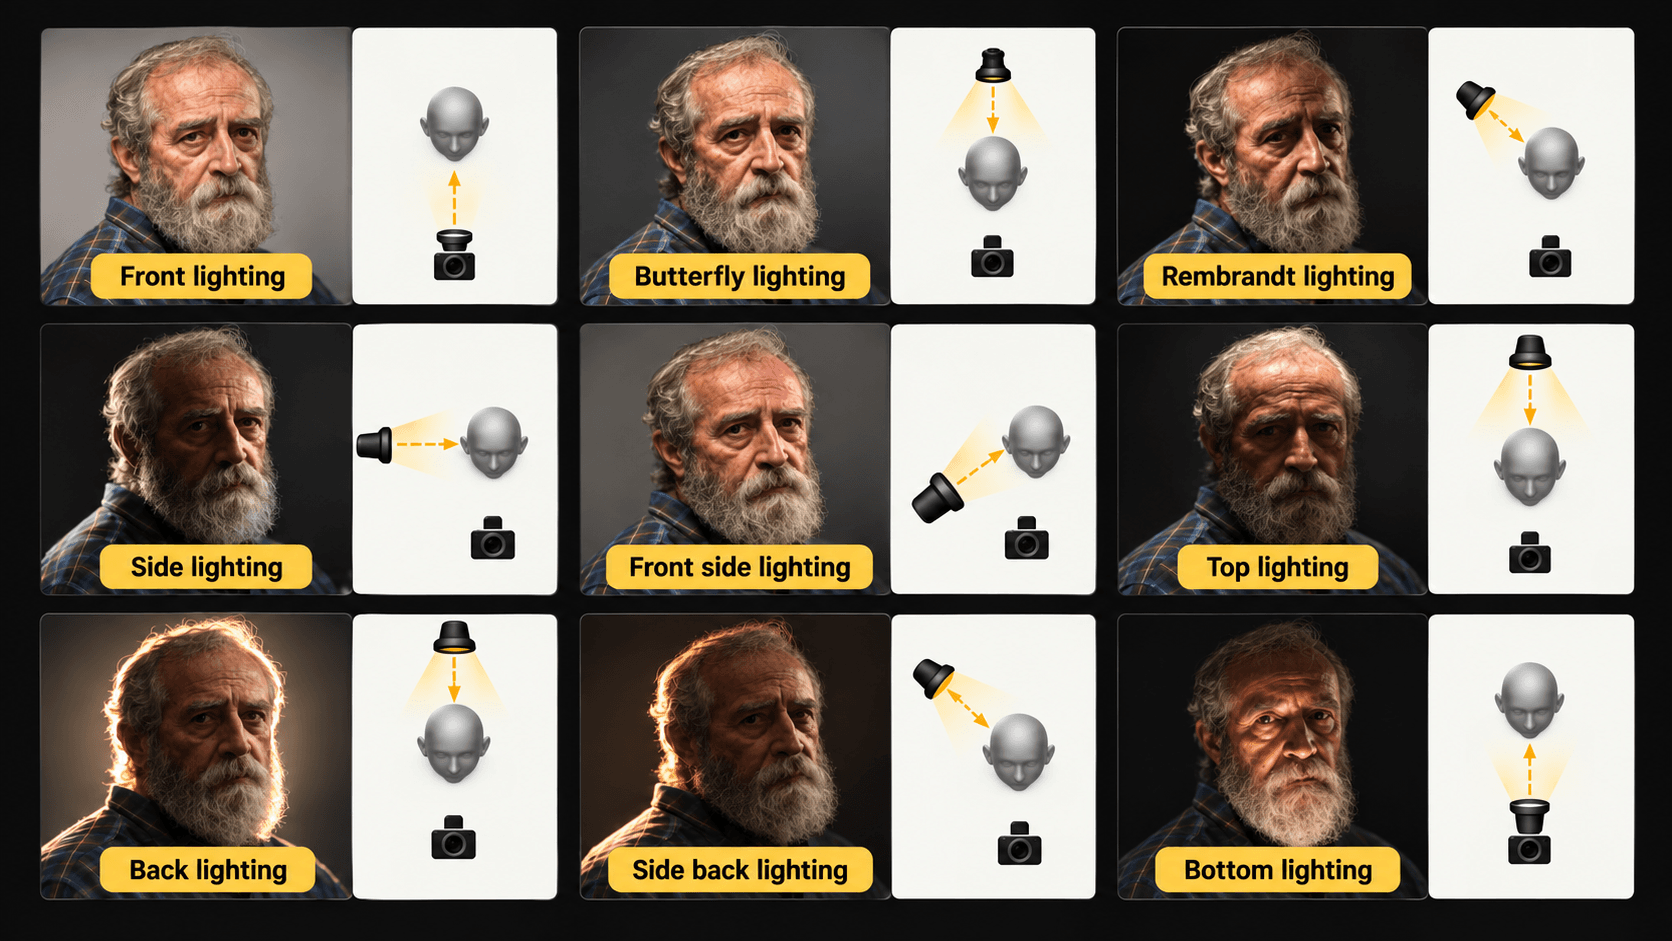
1. Back Lighting
Backlighting places the primary light behind the subject, creating a bright outline around the hair and shoulders. It's particularly effective for cinematic portraits, lifestyle content, and atmospheric brand visuals.
Apply cinematic backlighting with a strong daylight-balanced
light source positioned 180 degrees behind the subject and
slightly above head level.

Use approximately 5600K lighting with high rear intensity
and a weak, soft frontal fill. Create a clearly defined rim
light around the hair and shoulders while maintaining
subtle facial detail and controlled highlights.

Preserve the original subject, skin texture, background,
and camera composition.
UGC Setup Tip: Position a light behind the subject and use a reflector or low-intensity frontal light to maintain sufficient facial visibility.
2. Side Back Lighting
Side backlighting places the source diagonally behind the subject, producing highlights along one side of the face, hair, and shoulders. It creates depth while maintaining a dramatic atmosphere.
Apply side backlighting with a medium-high intensity
light source positioned approximately 135 degrees
from the camera-facing direction and 30 degrees above eye level.

Use a color temperature of 4500K with focused, moderately
soft illumination. Create a bright edge highlight along
one side of the hair and shoulders, with deeper shadows
on the opposite side.

Add minimal frontal fill to retain natural facial details.
Preserve the subject's original identity and composition.
UGC Setup Tip: Place a light behind and slightly to one side of the subject, then adjust its angle to control the rim highlight.
3. Top Lighting
Top lighting illuminates the subject from above, producing prominent highlights on the forehead and nose while creating deeper shadows beneath facial features. It works well for dramatic or conceptual portraits.
Apply overhead top lighting with a medium-high intensity
light source positioned nearly directly above the subject.

Use neutral daylight illumination at approximately 5600K
with moderately focused light and minimal fill.

Create realistic downward shadows beneath the eyebrows,
nose, and chin while preserving skin texture and
natural facial proportions.

Maintain the original background, subject identity,
and camera composition.
UGC Setup Tip: Position an overhead LED or softbox above the subject and adjust its diffusion to prevent overly harsh facial shadows.
4. Side Lighting
Side lighting illuminates one half of the face more strongly than the other, creating contrast and emphasizing facial structure. It's commonly used for dramatic portrait photography and cinematic storytelling.
Apply dramatic side lighting with the key light positioned
90 degrees to camera-left at approximately eye level.

Use medium-high intensity lighting at 5600K with a target
4:1 key-to-fill ratio and moderately soft shadow edges.

Illuminate one side of the face while maintaining deep
but detailed shadows on the opposite side.

Preserve realistic skin texture, facial identity,
and the original camera framing.
UGC Setup Tip: Place the key light beside the subject and use a reflector to adjust shadow depth.
5. Front Side Lighting
Front-side lighting positions the key light approximately 45 degrees from the camera, creating natural facial dimension without excessive shadows. It's a practical choice for interviews, talking-head videos, and product demonstrations.
Apply soft front-side lighting with a large diffused
key light positioned 45 degrees to camera-left and
approximately 20 degrees above eye level.

Use medium intensity daylight-balanced light at 5600K
with a target 2:1 key-to-fill ratio.

Create gentle shadows along the cheek and nose while
maintaining bright eyes, even skin exposure,
and natural facial depth.

Preserve the subject's identity, clothing,
background, and framing.
UGC Setup Tip: Position a diffused LED panel or softbox at a 45-degree angle and use subtle fill to maintain a clean, approachable appearance.
6. Rembrandt Lighting
Rembrandt lighting creates a recognizable triangular highlight on the shadowed cheek. Its combination of directional illumination and deeper shadows produces a classic, cinematic portrait style.
Apply classic Rembrandt lighting with a soft directional
key light positioned 45 degrees to camera-left
and approximately 35 degrees above eye level.

Use medium-high intensity lighting at 4500K
with a target 4:1 key-to-fill ratio.

Create a small triangular highlight beneath the eye
on the shadowed side of the face, with realistic
cheek and nose shadows and controlled highlights.

Preserve natural skin texture, facial identity,
and the original portrait composition.
UGC Setup Tip: Raise and angle the key light until the nose and cheek shadows connect, leaving a small illuminated triangle on the shadow-side cheek.
7. Front Lighting
Front lighting creates relatively even illumination with minimal directional shadows. It works particularly well for tutorials, beauty content, and straightforward product presentations.
Apply soft frontal lighting with a large diffused source
positioned close to the camera axis at eye level.

Use medium intensity illumination at 5600K
with low contrast and a target 2:1 key-to-fill ratio.

Create balanced facial exposure, soft shadows,
natural skin texture, and clear eye highlights.

Avoid flat overexposure or artificial skin smoothing.
Preserve the original subject and composition.
UGC Setup Tip: Use a diffused LED panel or ring light near the camera, adjusting the intensity to preserve natural facial dimension.
8. Butterfly Lighting
Butterfly lighting uses an elevated frontal light to create a small symmetrical shadow beneath the nose. It's popular in beauty, editorial, and portrait photography because it can emphasize facial symmetry and cheekbone definition.
Apply professional butterfly lighting with a large
diffused key light positioned directly in front
of the subject and approximately 40 degrees above eye level.

Use medium intensity lighting at 5600K
with a target 3:1 key-to-fill ratio.

Create a small symmetrical butterfly-shaped shadow
beneath the nose, soft cheekbone definition,
and balanced highlights across the face.

Maintain realistic skin texture, natural exposure,
and the original subject identity.
UGC Setup Tip: Position a soft light above the camera and add a reflector beneath the subject's face if additional fill is needed.
9. Bottom Lighting
Bottom lighting illuminates the face from below, producing unusual upward shadows. It's especially useful for horror, suspense, experimental photography, and dramatic storytelling.
Apply dramatic bottom lighting using a medium-high intensity
light source positioned below the subject's face
and angled upward approximately 35 degrees.

Use a color temperature of 4500K with focused illumination
and minimal frontal fill.

Create distinctive upward shadows around the nose,
eyebrows, and eye sockets while preserving
natural facial geometry and controlled exposure.

Maintain the original identity, hairstyle,
background, and camera composition.
UGC Setup Tip: Position a light below face level and carefully control its intensity to avoid excessive brightness or distracting shadows.
After generating the nine images, arrange them into a 3×3 comparison grid with consistent framing, background, and image dimensions. This allows you to compare lighting direction, shadow placement, and overall mood without other visual changes interfering with the results.
Tips for Better AI Relighting
Creating convincing lighting variations is only part of the process. For content creators and videographers, the real value comes from using those images to make practical decisions before filming.
Preserve the original subject. Always reuse the same reference image rather than generating each variation from a previously edited result. Include instructions to maintain facial structure, hairstyle, skin texture, clothing, and camera framing. If a result changes the subject's appearance, revise the prompt and regenerate that version.
Describe lighting precisely. Specify whether the light is hard or soft, where it's positioned, how strong it should appear, and which shadows it should create. For example, "soft daylight from camera-left at 45 degrees with gentle cheek shadows" provides clearer direction than "beautiful cinematic lighting."
Keep color temperature intentional. Daylight-balanced lighting around 5600K typically produces a neutral daylight appearance, while warmer temperatures around 3200K can suggest tungsten-style illumination. When comparing setups, watch for unintended changes in skin tone, clothing color, or background appearance.
Check whether the lighting makes sense. AI-generated shadows may not always follow physically accurate light behavior. Review whether highlights and shadows correspond to the requested source direction, especially for techniques such as Rembrandt and butterfly lighting.
Plan your real setup. Select two or three promising AI lighting previews and translate them into practical on-set starting points. Consider the available LED panels, softboxes, reflectors, room dimensions, ambient light, and camera exposure before attempting to recreate the look.
For example, a skincare UGC creator might compare front lighting, butterfly lighting, and soft front-side lighting. If the 45-degree setup creates the most suitable visual mood, the creator can plan to position a diffused LED panel camera-left and use a reflector to control shadow depth. This doesn't guarantee an identical result, but it reduces guesswork during setup.
Frequently Asked Questions
1. What is AI relighting?
AI relighting uses artificial intelligence to change or recreate lighting in an existing image. It allows users to experiment with lighting direction, intensity, shadows, and color temperature while attempting to preserve the original subject.
2. Can AI relighting help with UGC video production?
Yes. UGC creators can use AI-generated lighting previews to compare visual styles before filming, communicate creative direction, and identify potential equipment requirements. However, AI previews are not exact physical simulations of real lighting setups.
3. How can I keep the same face when changing lighting with AI?
Use a consistent reference image and specify that the model should preserve facial identity, skin texture, hairstyle, clothing, and camera composition. Generate each lighting variation from the original image and review the results for unwanted changes.
4. What should I include in AI lighting prompts?
Effective AI lighting prompts describe light direction, approximate intensity, softness, color temperature, contrast, and shadow placement. For portrait editing, include identity-preservation instructions to minimize changes unrelated to lighting.
5. Which portrait lighting style works best for UGC videos?
Soft front lighting and front-side lighting are practical choices for many talking-head videos, tutorials, and product demonstrations. Butterfly lighting can suit beauty content, while side lighting and Rembrandt lighting may work better for dramatic storytelling. The best option depends on the desired mood, subject, location, and available equipment.
Final Thoughts
Professional lighting is not only about having the right equipment. It's also about understanding how different light sources influence a subject's appearance and the mood of an image.
With AI relighting, creators can explore nine distinct portrait lighting styles using one reference image, compare their visual impact, and prepare clearer creative references before arriving on set.
For UGC creators, photographers, and marketers, this workflow offers a practical way to experiment with lighting concepts before investing time in physical setups.
Test the Light Before You Shoot.
- #Informational
Alternatives
Discover the best alternatives to 1minAI and compare features, pricing, and use cases.

1min.AI vs OpenRouter
1min.AI vs. OpenRouter: Compare the ready-to-use AI creation product against the technical API tool. Find out if you need a zero-code creative studio or a coding infrastructure hub.
 Ngoc Hong
1min.AI vs Jarvis AI
Compare 1min.AI vs Jarvis AI to discover which AI platform is better for writing, research, automation, and content creation. Find the best AI assistant for your workflow.
Ngoc Hong
1min.AI vs Taskade
Compare 1min.AI vs Taskade for AI content creation, automation, agents, and creative workflows to find the right workspace.
Ngoc HongAI Tools
Discover the best AI tools to boost productivity, creativity, and everyday work.
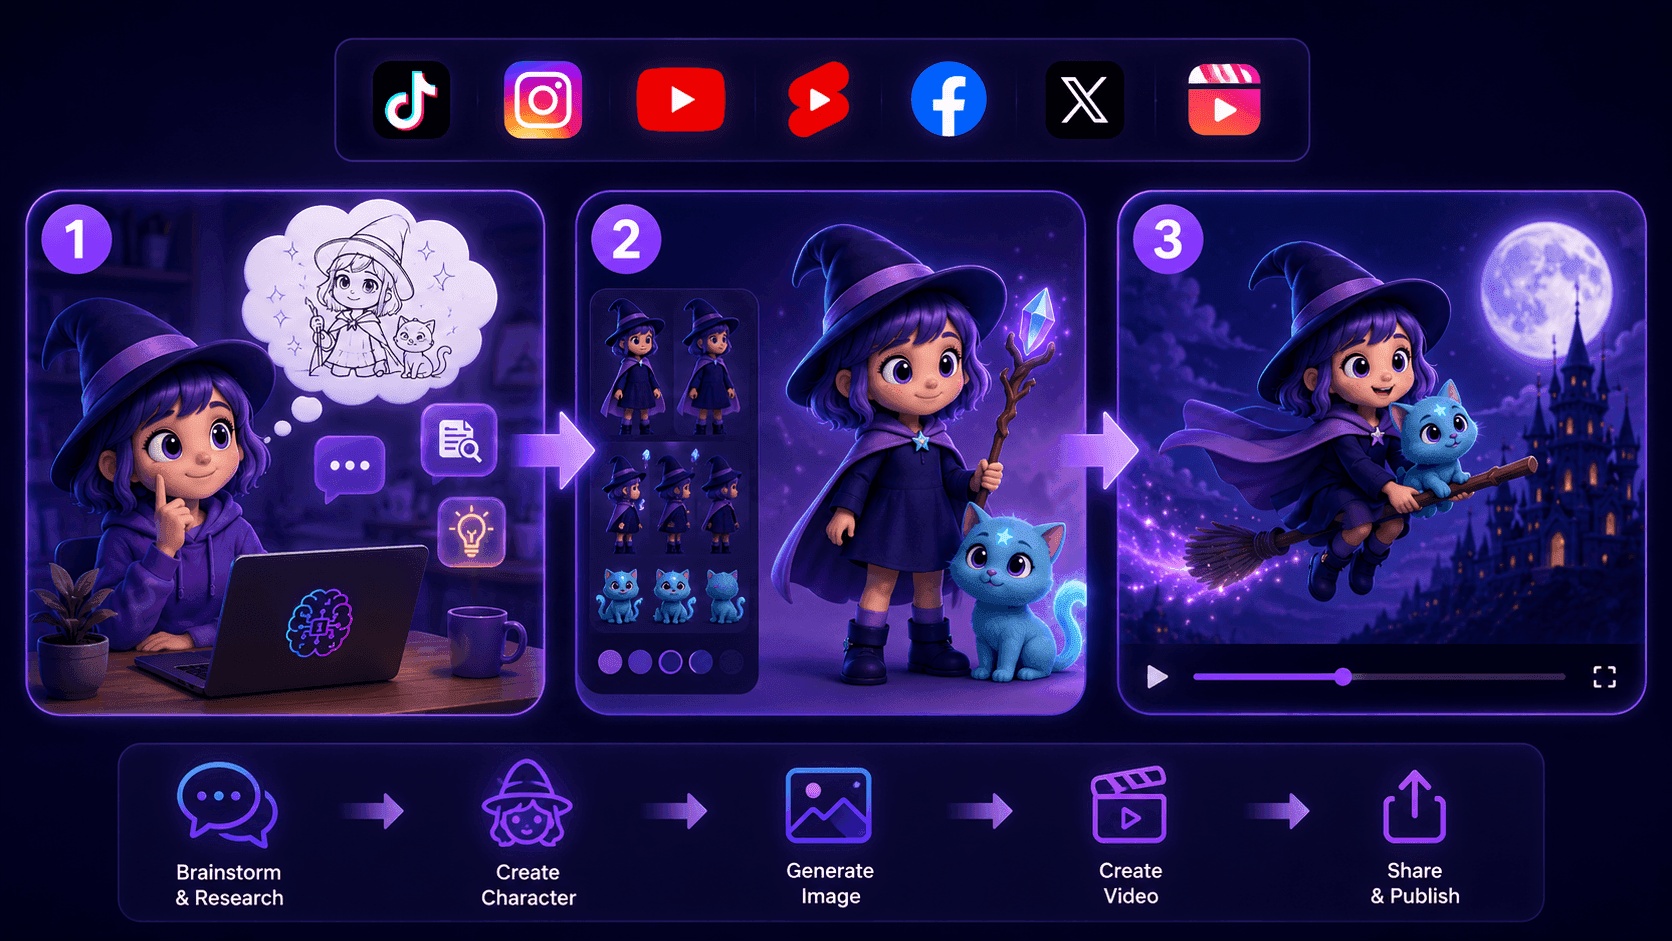
Create Consistent Cartoon Content in Just a Few Steps
Create engaging cartoon videos for TikTok and Reels with 1min.AI. Research ideas, create characters, and turn images into animated videos in 3 simple steps.
 Lien Anh Vu
One Product, 10 UGC Creatives: How AI Makes Content Testing Easier
Create more authentic UGC with an AI UGC video generator, test more creative angles and scale affiliate content without filming every version.
Lien Anh Vu
Top 4 Affordable AI Tools for Startup Founders
Discover the top 4 affordable AI tools for startup founders to validate ideas, build products, create content, and launch faster without overspending.
 Tram Ta
AI Features
Comprehensive AI features that streamline workflows, improve efficiency, and empower teams to achieve more.
Create Consistent Cartoon Content in Just a Few Steps
Create engaging cartoon videos for TikTok and Reels with 1min.AI. Research ideas, create characters, and turn images into animated videos in 3 simple steps.
Lien Anh VuOne Product, 10 UGC Creatives: How AI Makes Content Testing Easier
Create more authentic UGC with an AI UGC video generator, test more creative angles and scale affiliate content without filming every version.
Lien Anh Vu
1minAI: Free AI Grammar Checker
Check grammar for free with 1minAI’s AI grammar checker. Find grammar, spelling, and writing mistakes, improve clarity, and polish your content in seconds.
Tram TaAI Use Cases
A curated collection of AI use cases for business, productivity, and industry-specific applications.
Create Consistent Cartoon Content in Just a Few Steps
Create engaging cartoon videos for TikTok and Reels with 1min.AI. Research ideas, create characters, and turn images into animated videos in 3 simple steps.
Lien Anh VuOne Product, 10 UGC Creatives: How AI Makes Content Testing Easier
Create more authentic UGC with an AI UGC video generator, test more creative angles and scale affiliate content without filming every version.
Lien Anh Vu
Best Time to Post on Instagram: A Practical Guide for Better Engagement
Discover the best time to post on Instagram, including the best days and times for different audiences, plus tips to find the ideal posting schedule for your account.
Tram TaAI Tutorials
Learn how to use AI with practical, step-by-step tutorials.

Black Friday AI Tool Deals in 2026
Discover what Black Friday AI tool deals 2026 has to offer. Find out how to secure the 1min.AI lifetime deal via AppSumo, Dealify, Stack Social, and verify on Trustpilot, Slashdot, and Software Advice.
 Hang Nguyen
Create Consistent Cartoon Content in Just a Few Steps
Create engaging cartoon videos for TikTok and Reels with 1min.AI. Research ideas, create characters, and turn images into animated videos in 3 simple steps.
Lien Anh Vu
[Seedance 2.5 New] Better AI Product Videos, Less Rework in 1min.AI
Use Seedance 2.5 image to video on 1min.AI to create more consistent AI product videos, reduce failed generations, save credits, and improve UGC workflows.
Lien Anh VuAI Guides
Learn AI faster with practical guides, real-world examples, and actionable best practices.

Safely Buy AI Tools Online: 2026 Black Friday Guide
Discover how to find and secure the best Black Friday AI deals online. Learn expert strategies to avoid scams, combat subscription fatigue, and verify software.
Hang NguyenCreate Consistent Cartoon Content in Just a Few Steps
Create engaging cartoon videos for TikTok and Reels with 1min.AI. Research ideas, create characters, and turn images into animated videos in 3 simple steps.
Lien Anh Vu[Seedance 2.5 New] Better AI Product Videos, Less Rework in 1min.AI
Use Seedance 2.5 image to video on 1min.AI to create more consistent AI product videos, reduce failed generations, save credits, and improve UGC workflows.
Lien Anh VuAI Solutions
Browse the best AI solutions for automation, coding, research, productivity, customer support, marketing, and business workflows.
Safely Buy AI Tools Online: 2026 Black Friday Guide
Discover how to find and secure the best Black Friday AI deals online. Learn expert strategies to avoid scams, combat subscription fatigue, and verify software.
Hang NguyenCreate Consistent Cartoon Content in Just a Few Steps
Create engaging cartoon videos for TikTok and Reels with 1min.AI. Research ideas, create characters, and turn images into animated videos in 3 simple steps.
Lien Anh VuOne Product, 10 UGC Creatives: How AI Makes Content Testing Easier
Create more authentic UGC with an AI UGC video generator, test more creative angles and scale affiliate content without filming every version.
Lien Anh VuAI Models
Explore the world's leading AI models in one place.
Create Consistent Cartoon Content in Just a Few Steps
Create engaging cartoon videos for TikTok and Reels with 1min.AI. Research ideas, create characters, and turn images into animated videos in 3 simple steps.
Lien Anh VuOne Product, 10 UGC Creatives: How AI Makes Content Testing Easier
Create more authentic UGC with an AI UGC video generator, test more creative angles and scale affiliate content without filming every version.
Lien Anh Vu[Seedance 2.5 New] Better AI Product Videos, Less Rework in 1min.AI
Use Seedance 2.5 image to video on 1min.AI to create more consistent AI product videos, reduce failed generations, save credits, and improve UGC workflows.
Lien Anh VuAI Comparisons
Compare AI tools, models, and platforms to find the best fit for your needs.
Kling AI Vs Veo 3: Which Model Wins?
Kling AI vs Veo 3: compare motion, native audio, pricing & free tiers to see which AI video generator wins for your project - try both on 1min.AI.
 Trang Tran
[Seedance 2.5 New] Better AI Product Videos, Less Rework in 1min.AI
Use Seedance 2.5 image to video on 1min.AI to create more consistent AI product videos, reduce failed generations, save credits, and improve UGC workflows.
Lien Anh Vu
DeepSeek V4 Pro vs Flash Comparison
Compare DeepSeek V4 Pro vs DeepSeek V4 Flash metrics. Optimize your agentic apps and improve AI fact checking on 1min.ai today.
Ngoc HongAI Integrations
Seamlessly integrate AI with the tools you already use to automate work and boost productivity.

POV: You Have 10+ Posts to Make Every Day
Learn how to build an AI content workflow that helps content creators produce 10+ social media posts a day faster with AI brainstorming, image generation, and content creation.
Lien Anh Vu
How to Use an AI Fashion Video Generator for Fashion Week 2026
Turn Fashion Week 2026 ideas into stunning fashion videos with AI. Learn how to brainstorm, create visuals, and transform images into videos with one simple workflow.
Lien Anh Vu
Stop Switching Between AI Apps: How AI Integration Transforms Employer Branding
Discover how AI integration helps HR teams streamline employer branding by combining AI writing, documents, images, video, and multiple AI models into one workspace.
Tram TaAI for Industries
Find the best AI tools and workflows for healthcare, finance, education, legal, manufacturing, retail, real estate, and more

Best Business Productivity Tools for Startups to Maximize Profits | 1minAI
Discover the best business productivity tools for startups to save time, streamline workflows, reduce repetitive tasks, and support profitable growth with AI.
Tram Ta
Best AI Tool for Content Marketing |1minAI
Looking for the best AI tool for content marketing? See how 1minAI helps marketers research, write, repurpose, create visuals, and scale content from one AI workspace.
Tram Ta
7 Low-Cost AI Business Ideas for Your Startup
Explore 7 low-cost AI business ideas you can start with a small budget, from content and video services to AI consulting, reselling, and automation.
Tram TaAI Agents
Discover and run AI agents to automate tasks across your work and daily life.
1minAI: Free AI Grammar Checker
Check grammar for free with 1minAI’s AI grammar checker. Find grammar, spelling, and writing mistakes, improve clarity, and polish your content in seconds.
Tram Ta
AI Agents for Facebook
Use an AI Agent for Facebook to create content, generate images, schedule posts, and publish from your documents and conversations.
Ngoc Hong
AI Agent vs AI Assistant: Which One Actually Saves Designers More Time?
Learn the difference between AI Agent vs AI Assistant and discover which solution helps designers automate repetitive work, reduce revisions, and save more time.
Lien Anh VuAI Workflows
Explore ready-to-use AI workflows for productivity, marketing, sales, support, and more.
Create Consistent Cartoon Content in Just a Few Steps
Create engaging cartoon videos for TikTok and Reels with 1min.AI. Research ideas, create characters, and turn images into animated videos in 3 simple steps.
Lien Anh VuOne Product, 10 UGC Creatives: How AI Makes Content Testing Easier
Create more authentic UGC with an AI UGC video generator, test more creative angles and scale affiliate content without filming every version.
Lien Anh VuPOV: You Have 10+ Posts to Make Every Day
Learn how to build an AI content workflow that helps content creators produce 10+ social media posts a day faster with AI brainstorming, image generation, and content creation.
Lien Anh VuNewsletter
Weekly AI Innovations with 1minAI

🔮 Weekly AI Innovations #141: Seedance 2.5 & Stable Audio 3: Next-Gen AI
Explore Seedance 2.0, 2.5, and StabilityAI's Stable Audio 3 on 1min.ai. Generate studio-grade audio and synchronized motion with next-gen generative AI.
Hang Nguyen
🔮 Weekly AI Innovations #140: Deepseek 4.1 Flash & Gemini Upgrades
Explore Deepseek 4.1 Flash and new Gemini models on 1min.ai. Plus, check our update on your Billing - Usage page for better clarity.
Hang Nguyen
🔮 Weekly AI Innovations #139: Dawn of the next-gen AI
Discover the immense power of GPT-6 Astra and Claude Fable 5.1. Unlock next-generation AI models on 1min.ai to solve complex tasks effortlessly.
Hang Nguyen